
How to Make Homemade Aloe Vera Creams: Easy and Natural Recipes to Care for Your Skin
Aloe vera is one of the most versatile and beneficial natural ingredients for skin care. Its moisturizing, soothing, and regenerating properties make it a perfect ally to combat dryness, irritations, and signs of aging.
Can you imagine being able to enjoy all these benefits in creams you make yourself at home?
Benefits of Aloe Vera for the Skin
Aloe vera acts as a natural moisturizer by retaining moisture in the skin. Its gel penetrates the deeper layers, helping to keep it soft and flexible. Promotes cell regeneration, stimulating the repair of damaged tissues.
Soothes irritations and redness caused by external factors like sun or cold. Contains calming properties that reduce discomfort and improve skin texture. Fights signs of aging with antioxidants like vitamins C and E, which protect against free radicals.
Supports oily skin control thanks to its astringent properties, regulating sebum production. Minimizes acne marks and spots, promoting an even appearance. On dry skin, its nourishing action restores elasticity and prevents flaking.
Provides a protective barrier against external agents, creating a fresh feeling. Enhances the absorption of other ingredients in homemade creams, boosting their effectiveness.
Necessary Materials and Tools
Making homemade creams with aloe vera requires certain specific ingredients and tools. Make sure you have everything ready before you start.
Basic Ingredients
-
Fresh aloe vera: Use gel extracted directly from the plant to ensure its purity and properties.
-
Base oil: Choose options like coconut, almond, or jojoba oil. These oils provide extra hydration.
-
Beeswax: Helps give a creamy consistency and seals hydration in the skin.
-
Essential oils: Include lavender, tea tree, or chamomile for additional benefits and to scent the cream.
-
Vitamin E: Provides antioxidant properties and extends the cream's shelf life.
-
Distilled water: Ensures purity in the mixture and improves the texture of the final product.
Tools You Will Need
-
Blender: Mix all ingredients evenly and ensure a uniform texture.
-
Heat-resistant pots or containers: Safely melt ingredients like beeswax.
-
Silicone spatula: Makes handling and extracting the cream easier without waste.
-
Airtight jars: Store creams and preserve their properties longer.
-
Kitchen scale: Accurately measure the quantities of each ingredient.
-
Hand whisk: Achieve a lighter texture if you prefer a less dense cream.
Providing the right materials and tools ensures you prepare effective, high-quality creams.
Aloe Vera Preparation
Fresh aloe vera ensures effective homemade creams with optimized properties. Pay attention to the extraction and leaf selection process to get the best results for your skin.
How to Extract Aloe Vera Pulp
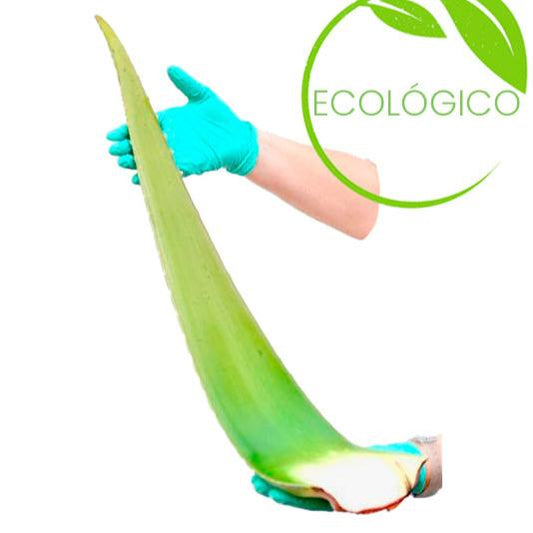
Cut an aloe vera leaf near the base of the plant.
Remove the side spines with a sharp knife to avoid any irritation.
Wash the leaf thoroughly with water to remove dust or dirt residues.
Cut the leaf into smaller sections according to your preferred size.
Remove the outer skin using a knife or spoon.
Extract only the clear inner gel, making sure to discard any yellow parts inside.
Process the gel in a blender to achieve a smooth texture if you want to apply it in creams or make easier mixtures.
Tips for Choosing the Best Aloe Vera Leaves
Look for thick, fleshy-looking leaves, as they contain more gel inside.
Make sure the leaves have a uniform green color, without spots or discolorations that indicate damage or disease.
The lower leaves of mature plants are ideal as they have a high concentration of nutrients. Avoid dry, broken, or damaged-edged leaves, as they usually contain less gel or reduced properties.
Prioritize using freshly cut aloe from plants grown under proper conditions without fertilizers or chemicals.
Homemade Aloe Vera Cream Recipes
Create homemade aloe vera creams to naturally care for your skin. Take advantage of the regenerative, moisturizing, and soothing properties of this ingredient with these recipes.
Simple Aloe Vera Moisturizing Cream
Prepare a basic cream to keep your skin hydrated all day. In a container, mix 100 grams of fresh aloe vera gel with 50 milliliters of melted coconut oil. Add 10 drops of lavender essential oil for a relaxing touch. Mix until smooth and store in an airtight jar in the refrigerator. Use daily after showering.
Cream for Sensitive Skin with Aloe Vera and Chamomile
Care for your sensitive skin by incorporating soothing properties. Combine 100 grams of aloe vera gel with 20 milliliters of concentrated chamomile infusion. Add 30 grams of previously melted beeswax and mix while cooling. Once lukewarm, add 5 drops of chamomile essential oil. Store in a clean container and apply to affected areas or the entire face.
Anti-Wrinkle Cream with Aloe Vera and Rosehip Oil
Reduces signs of aging with this antioxidant formula. Mix 100 grams of aloe vera gel with 30 milliliters of rosehip oil. Add 5 vitamin E capsules (pierce the capsules to extract the contents). Use a hand blender to achieve a creamy consistency. Store the cream in dark jars to protect it from light and apply it on expression lines at night.
Repairing Hand Cream with Aloe Vera and Honey
Provides intense hydration and restorative care for your hands. Add 100 grams of aloe vera gel to a container along with 2 tablespoons of pure honey. Incorporate 20 milliliters of almond oil to enhance softness. Blend the ingredients with a hand whisk until a stable emulsion forms. Use at least twice a day to see results on dry or damaged skin.
Tips for Storing Homemade Creams
Proper storage ensures the longevity and effectiveness of homemade aloe vera creams. Implementing correct storage strategies prevents contamination and loss of properties.
Recommended Jars for Storing Creams
Use amber or dark glass jars, as they limit light exposure and protect active ingredients. Choose airtight containers that prevent air and moisture from entering, avoiding oxidation and deterioration. It is preferable to opt for small sizes, reducing exposure time when opened.
Make sure jars are completely clean and sterilized before filling them. To sterilize, boil the containers for 10 minutes and let them dry completely. Avoid using plastic containers to minimize the risk of chemical reactions with oils or natural ingredients.
Shelf Life and Precautions
The shelf life of homemade creams depends on the ingredients. Those containing fresh aloe vera usually last between 7 and 10 days if refrigerated. Adding natural preservatives like vitamin E can extend their duration up to 3 weeks.
Store creams in a cool place away from direct light to preserve their properties. Regularly check the cream’s condition, discarding it if there are changes in texture, smell, or color. Always use clean utensils when extracting product to avoid contaminating the rest.
Common Problems and Solutions
Troubleshooting during the preparation of homemade aloe vera creams ensures a better result and maximizes their benefits. Learn how to handle the most common situations with these solutions.
My Cream Has a Lumpy Texture
Using ingredients at different temperatures often causes this texture. Make sure to slightly warm the beeswax and base oils, such as coconut or almond oil, so they blend better with the aloe vera gel. Mix the ingredients immediately after heating them using a blender or a hand whisk. If the problem persists, strain the lumps before transferring the cream to the jar.
The Cream Has Separated, What Should I Do?
Phase separation usually occurs due to incomplete emulsification. Use beeswax in appropriate amounts to stabilize the mixture. You can also reheat the cream in a double boiler and whisk again until you achieve a uniform consistency. Using distilled water instead of regular water improves the emulsion, helping to keep the ingredients together.
Allergic Reactions: What to Keep in Mind
Check your skin’s sensitivity before using the creams. Perform a test by applying a small amount to the inside of your wrist and wait 24 hours. Make sure to use only natural and fresh ingredients, such as essential oils and aloe vera gel, avoiding low-quality or expired products. If you experience irritation, remove the product immediately and consult a dermatologist.
Warnings and Precautions
Making homemade aloe vera creams has benefits but also requires taking measures to avoid risks. Be sure to follow these recommendations to ensure safe and effective use.
Perform a Sensitivity Test Before Use
Apply a small amount of the prepared cream to a specific area, such as the inside of your forearm. Wait 24 hours and observe for any adverse reactions like redness, itching, or swelling. This step is crucial to identify possible allergies, especially if aloe vera or any other ingredient is new to you.
Use of High-Quality Natural Ingredients
Choose fresh, organic aloe vera gel to optimize the benefits of your creams. Use base oils without additives, such as extra virgin coconut or cold-pressed almond oil, as they ensure gentle and safe results. Opt for pure essential oils and avoid synthetic products to minimize irritation. Prioritize ingredients with ecological certifications if possible, as well as vitamin E and beeswax to preserve their natural properties.
Conclusion
Making your own aloe vera cream not only allows you to care for your skin naturally but also to customize each formula according to your needs. By using fresh, quality ingredients, you maximize the benefits of aloe vera while avoiding unnecessary chemicals.
Remember to follow the proper preparation and storage steps to ensure the effectiveness and safety of your creams. With a little practice, you can enjoy natural products that nourish, hydrate, and protect your skin in a simple and economical way.